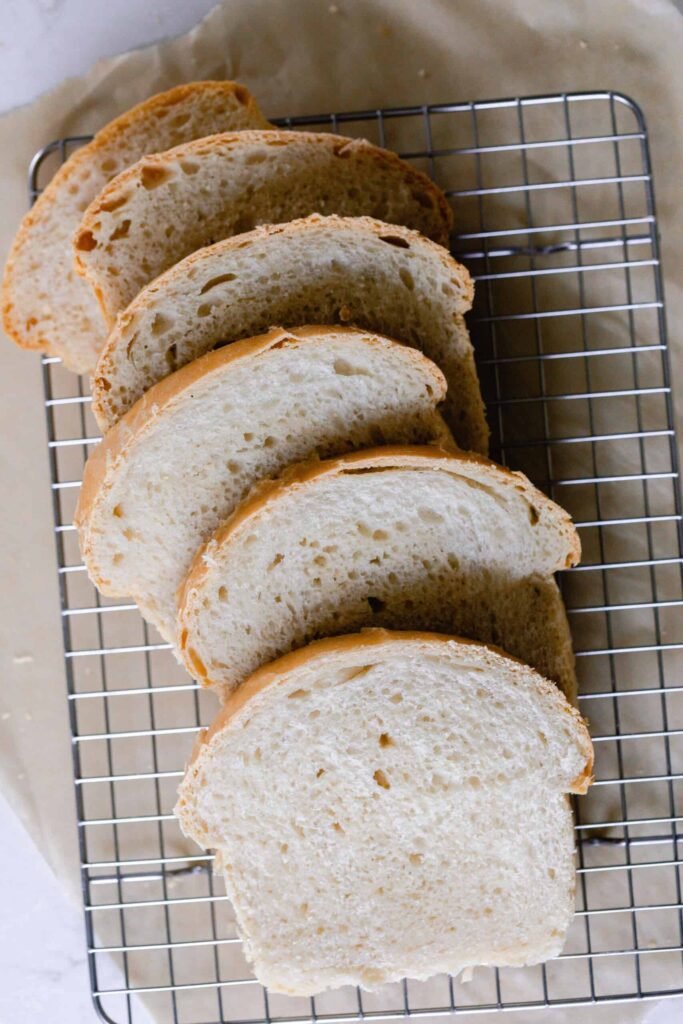

This gluten-free sandwich bread is soft, tender, lightly chewy, and easy to slice. It makes a great everyday loaf for sandwiches, toast, French toast, or breakfast. Unlike many gluten-free breads that turn dry or crumbly, this recipe uses a combination of gluten-free flour, starch, psyllium husk, and eggs to give the loaf a structure and soft texture.
Recipe Details
- Prep Time: 20 minutes
- Rise Time: 60–90 minutes
- Bake Time: 40–50 minutes
- Total Time: About 2 hours
- Yield: 1 loaf
- Servings: 10–12 slices
Ingredients
- 2 ½ cups gluten-free all-purpose flour blend, preferably with xanthan gum
- ½ cup tapioca starch
- 2 tablespoons psyllium husk powder
- 2 tablespoons granulated sugar or honey
- 1 teaspoon salt
- 2 ¼ teaspoons instant yeast
- 1 ¼ cups warm milk or unsweetened dairy-free milk
- 2 large eggs, room temperature
- 3 tablespoons olive oil or melted butter
- 1 teaspoon apple cider vinegar
- 1 teaspoon gluten-free xanthan gum, only if your flour blend does not already contain it
- 1 tablespoon sesame seeds or gluten-free oats, optional for topping
Equipment
- 8½ × 4½-inch loaf pan
- Large mixing bowl
- Whisk
- Wooden spoon or silicone spatula
- Kitchen towel
- Wire cooling rack
Instructions
1. Prepare the Loaf Pan
Lightly grease an 8½ × 4½-inch loaf pan with butter or oil. You can also line the bottom and two long sides with parchment paper to make removing the bread easier.
Set the pan aside while you prepare the dough.
2. Combine the Dry Ingredients
Add the gluten-free flour blend, tapioca starch, psyllium husk powder, sugar, salt, and instant yeast to a large mixing bowl.
If your gluten-free flour blend does not contain xanthan gum, add the xanthan gum at this stage.
Whisk everything together thoroughly so the yeast, salt, psyllium, and starch are evenly distributed.
3. Mix the Wet Ingredients
In a separate bowl, whisk together the warm milk, eggs, olive oil, and apple cider vinegar.
The milk should be warm but not hot. Very hot liquid can damage the yeast.
4. Make the Dough
Pour the wet mixture into the bowl containing the dry ingredients.
Using a sturdy spatula or wooden spoon, mix for about 2–3 minutes.
Gluten-free bread dough will look different from traditional wheat bread dough. Do not expect a firm, kneadable dough. It should be thick, sticky, and somewhat similar to a very thick cake batter.
Scrape down the sides of the bowl and make sure there are no dry pockets of flour remaining.
5. Transfer to the Pan
Spoon the dough into the prepared loaf pan.
Wet a spatula slightly and use it to smooth the top of the dough. Try to create an even surface because the bread will generally maintain the shape it has before rising.
If desired, sprinkle sesame seeds or gluten-free oats over the top.
6. Let the Bread Rise
Cover the pan loosely with a clean kitchen towel or plastic wrap.
Place it somewhere warm and allow it to rise for approximately 60–90 minutes.
The dough should become noticeably puffier and rise close to the top of the pan.
Don’t let it rise dramatically above the pan. Gluten-free bread can collapse if it is over-proofed.
7. Preheat the Oven
When the dough is nearly finished rising, preheat your oven to 375°F (190°C).
Allow the oven to fully preheat before putting the bread inside.
8. Bake
Place the loaf on the center rack of the oven.
Bake for approximately 40–50 minutes, or until the top is golden brown and the internal temperature reaches around 200–205°F (93–96°C).
If the top begins browning too quickly, loosely cover the loaf with aluminum foil during the final 15 minutes of baking.
9. Cool Completely
Remove the bread from the oven and let it cool in the pan for about 10 minutes.
Carefully lift it out and transfer it to a wire rack.
Allow the loaf to cool completely before slicing.
This step is especially important for gluten-free bread. Cutting it while it is still hot can make the inside appear gummy or sticky.
Once completely cool, slice with a sharp serrated bread knife.
Tips for the Best Gluten-Free Sandwich Bread
Use the correct flour blend: Gluten-free flour blends can vary significantly. A good commercial blend containing rice flour, tapioca or potato starch, and a binder generally works well.
Don’t add extra flour: The dough is supposed to be sticky. Adding additional flour can make the finished bread dense and dry.
Check your yeast: If your yeast has been sitting in the pantry for a long time, check its expiration date. Fresh yeast gives the bread a better rise.
Use warm—not hot—milk: The liquid should feel comfortably warm. Excessively hot liquid can interfere with yeast activity.
Don’t over-proof: Gluten-free dough doesn’t behave exactly like wheat dough. Once it has risen nicely, bake it rather than waiting for it to double dramatically.
Cool before slicing: This gives the crumb time to finish setting and produces much cleaner slices.
How to Store Gluten-Free Sandwich Bread
Once completely cooled, keep the bread in an airtight container or tightly wrapped at room temperature for up to 2–3 days.
For longer storage, slice the loaf and freeze the slices in a freezer-safe bag. Place parchment paper between slices if you don’t want them sticking together.
Frozen slices can be toasted directly from frozen, making this a convenient option for quick breakfasts and sandwiches.
Can I Make This Bread Dairy-Free?
Yes. Replace the milk with an unsweetened dairy-free milk such as almond, oat, or soy milk. Use olive oil instead of butter.
Always check the labels of your ingredients if you need the entire recipe to be strictly gluten-free.
Why Is My Gluten-Free Bread Gummy?
The most common causes are under-baking, slicing the bread while hot, too much liquid, or using a flour blend with a different absorption rate.
Make sure the center reaches approximately 200–205°F (93–96°C), and allow the loaf to cool completely before cutting.
Can I Make It Without Eggs?
Eggs contribute structure, moisture, and softness to this particular recipe. You can experiment with an egg replacer, but the texture will likely be different. For the most reliable result, I recommend making the recipe with eggs.
Final Thoughts
This homemade Gluten-Free Sandwich Bread is a practical everyday loaf that’s soft enough for sandwiches while still sturdy enough to toast. The combination of gluten-free flour, tapioca starch, psyllium husk, eggs, and a little oil helps create a tender crumb without relying on wheat flour.
Once cooled and sliced, keep a few slices ready for sandwiches and freeze the rest. It’s an easy way to have homemade gluten-free bread available whenever you need it.