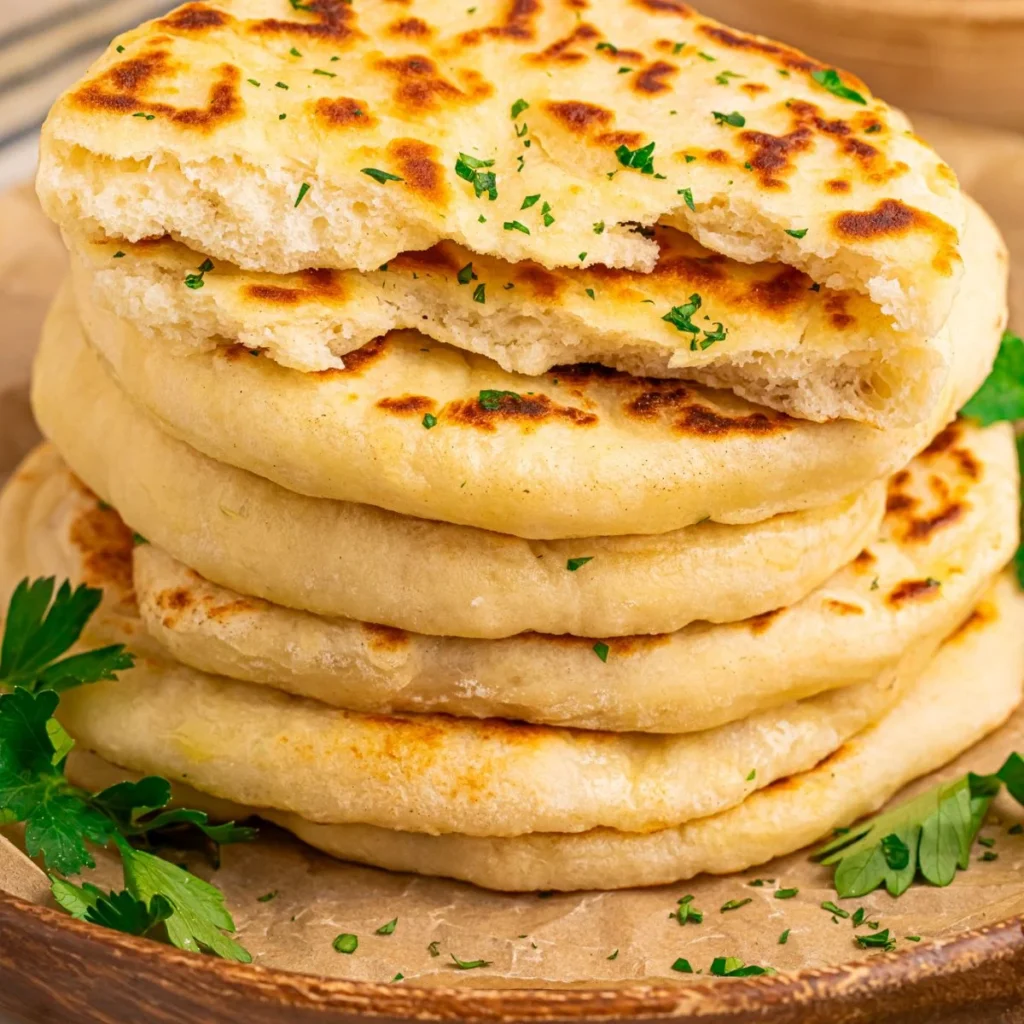

This gluten-free sourdough flatbread is soft, flexible, lightly chewy, and perfect for wraps, sandwiches, dipping, or serving alongside curries and grilled foods. It’s made with gluten-free sourdough starter and doesn’t require commercial yeast.
Recipe Information
Prep Time: 20 minutes
Fermentation Time: 4–8 hours
Cooking Time: 15–20 minutes
Total Time: About 5–9 hours, depending on fermentation
Yield: 6 flatbreads
Cuisine: Gluten-Free / Sourdough
Diet: Gluten-Free, Vegetarian
Ingredients
For the Flatbread
- 1 cup (240 g) active gluten-free sourdough starter
- 1 ½ cups (180 g) gluten-free all-purpose flour blend
- ½ cup (60 g) tapioca flour or tapioca starch
- 1 tablespoon psyllium husk powder
- ¾ teaspoon salt
- 1 tablespoon olive oil
- ½ cup (120 ml) warm water, plus more if needed
- 1 teaspoon honey or maple syrup, optional
For Cooking
- 1–2 tablespoons olive oil or avocado oil
Optional Toppings
- Minced garlic
- Fresh parsley or cilantro
- Sesame seeds
- Dried oregano
- Everything bagel seasoning
- Flaky sea salt
Instructions
1. Prepare the Psyllium Mixture
Add the warm water to a small bowl. Sprinkle in the psyllium husk powder and whisk immediately.
Let it sit for about 3–5 minutes. The mixture will become slightly thick and gel-like. This helps hold the gluten-free dough together and gives the flatbread a more flexible texture.
2. Mix the Dough
In a large mixing bowl, combine:
- Gluten-free flour blend
- Tapioca starch
- Salt
Mix well.
Add the active gluten-free sourdough starter, olive oil, honey or maple syrup if using, and the psyllium mixture.
Stir with a wooden spoon or spatula until everything comes together.
The dough should be soft and slightly sticky but shouldn’t look runny. Gluten-free dough can vary considerably depending on the flour blend and sourdough starter, so add 1 tablespoon of water at a time if the dough feels too dry.
3. Knead Briefly
Use your hands or a sturdy spatula to knead the dough for about 1–2 minutes.
You don’t need to develop gluten because this is a gluten-free recipe. The goal is simply to distribute the ingredients evenly.
Shape the dough into a ball.
4. Ferment the Dough
Cover the bowl with a lid, plastic wrap, or a damp kitchen towel.
Leave it at room temperature for approximately 4–8 hours, depending on the strength of your starter and the temperature of your kitchen.
The dough doesn’t necessarily need to double in size. Look for signs of fermentation such as:
- Slightly increased volume
- A softer texture
- Small bubbles
- A pleasant fermented aroma
For a stronger sourdough flavor, you can let the dough ferment toward the longer end of the range.
Important: If your kitchen is very warm, fermentation may happen much faster.
5. Divide the Dough
Once fermentation is complete, lightly flour your work surface with gluten-free flour.
Divide the dough into 6 equal portions for medium flatbreads.
Roll each portion into a smooth ball.
Keep the remaining dough covered while you work so it doesn’t dry out.
6. Roll the Flatbreads
Place one dough ball between two pieces of parchment paper.
Gently press it down with your hand, then roll it into a circle approximately ⅛-inch thick.
Try not to make the flatbread too thin because it can become brittle after cooking.
If the edges crack while rolling, simply press them together with your fingers.
7. Heat the Pan
Place a cast-iron skillet or nonstick frying pan over medium heat.
Allow it to become hot before cooking.
You can lightly brush the pan with a small amount of olive oil, although a dry skillet also works well.
8. Cook the Flatbread
Carefully remove the top piece of parchment.
Transfer the flatbread to the hot skillet.
Cook for approximately 2–3 minutes on the first side.
You should see small bubbles forming and light golden-brown spots appearing underneath.
Flip the flatbread and cook for another 1–2 minutes.
Avoid overcooking because gluten-free flatbread can become dry or hard if left on the heat too long.
Repeat with the remaining dough.
9. Keep Them Soft
As each flatbread comes off the skillet, place it inside a clean kitchen towel.
Covering the cooked flatbreads traps some steam and helps keep them soft and flexible.
If desired, brush each one lightly with olive oil or melted dairy-free butter.
Tips for the Best Gluten-Free Sourdough Flatbread
Use an Active Starter
For the best texture and fermentation, use a bubbly, active gluten-free sourdough starter that has recently been fed.
A weak or inactive starter may produce a denser flatbread.
Don’t Add Too Much Flour
Gluten-free dough can feel different from regular wheat dough. It’s tempting to keep adding flour when the dough feels sticky, but too much flour can make your flatbread dry and crumbly.
The dough should remain soft.
Psyllium Husk Is Important
Psyllium husk acts as a binder and gives gluten-free sourdough dough structure and flexibility.
If you’re using whole psyllium husk instead of psyllium husk powder, you may need slightly more because the two absorb liquid differently.
Adjust the Water
Different gluten-free flour blends absorb different amounts of water.
If your dough is dry and cracking, add a little more water.
If it’s extremely wet and impossible to shape, add a small amount of gluten-free flour blend.
Don’t Overcook
This is one of the most important tips.
The longer you cook gluten-free flatbread, the more moisture it loses. Cook just until you see light browning and the center is cooked through.
How to Serve Gluten-Free Sourdough Flatbread
There are so many ways to use these flatbreads.
For Breakfast
Serve warm with:
- Scrambled eggs
- Avocado
- Cream cheese
- Fried eggs
- Sautéed vegetables
For Lunch
Use them as wraps with:
- Grilled chicken
- Turkey
- Tuna
- Hummus
- Lettuce
- Tomato
- Cucumber
- Cheese
With Dinner
They work beautifully alongside:
- Curries
- Grilled chicken
- Kebabs
- Lentils
- Soups
- Stews
- Roasted vegetables
As a Quick Snack
Cut them into wedges and serve with:
- Hummus
- Guacamole
- Salsa
- Baba ganoush
- Garlic dip
Storage
Allow the flatbreads to cool completely before storing.
Room Temperature
Store in an airtight container or zip-top bag for 1–2 days.
Place parchment paper between them if you want to prevent sticking.
Refrigerator
Refrigerate for up to 5 days in an airtight container.
Keep in mind that refrigeration can make gluten-free bread products firmer.
Freezer
These flatbreads freeze very well.
Place parchment paper between each flatbread and store them in a freezer-safe bag or container for up to 2–3 months.
To use, thaw at room temperature and reheat in a skillet for about 30–60 seconds per side.
How to Reheat
For the best texture, warm the flatbread in a skillet over medium-low heat for approximately 30–60 seconds per side.
You can also microwave it for about 10–15 seconds, preferably wrapped in a slightly damp paper towel.
Don’t microwave for too long because it can become chewy or tough.
Final Thoughts
This gluten-free sourdough flatbread is a great recipe to keep in your regular baking rotation. The combination of gluten-free flour, tapioca starch, psyllium husk, and active sourdough starter creates a flatbread that is much more flexible than many homemade gluten-free versions.
For the softest results, don’t make the dough too dry, don’t roll the flatbreads excessively thin, and avoid overcooking them. Keep the cooked flatbreads covered with a kitchen towel while you finish the batch, and you’ll have soft, warm flatbreads ready for wraps, dips, curries, or sandwiches.