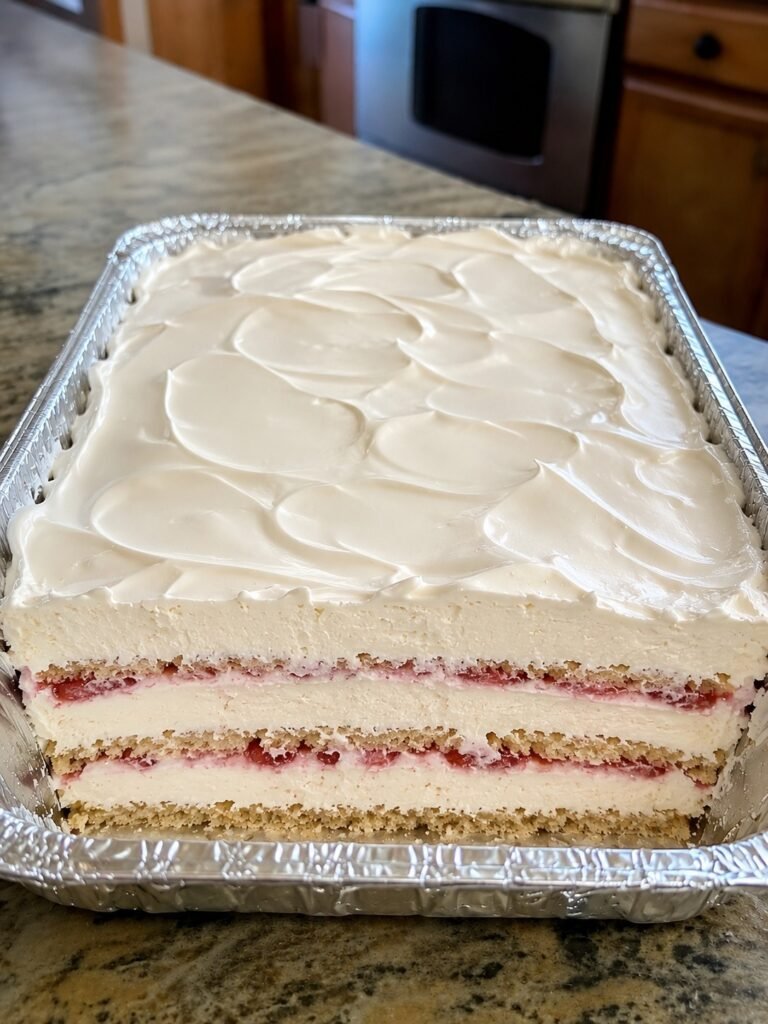
If you’re searching for a dessert that is incredibly easy to prepare yet looks and tastes like it came from a professional bakery, this Strawberry Icebox Cake is exactly what you need. This classic no-bake dessert combines layers of creamy vanilla filling, sweet strawberry preserves, fluffy whipped topping, and graham crackers that soften into delicate cake-like layers after chilling. The result is a rich, smooth, and refreshing dessert that requires no oven and very little effort.
One of the reasons Strawberry Icebox Cake has remained a favorite for generations is its simplicity. Unlike traditional cakes that require mixing batter, baking, cooling, and decorating, this dessert comes together through a simple layering process. As it chills in the refrigerator, the graham crackers absorb moisture from the creamy filling and transform into tender layers that resemble soft sponge cake.
Whether you’re preparing a dessert for a summer barbecue, family gathering, birthday celebration, holiday meal, potluck dinner, or simply craving something sweet, this recipe is guaranteed to impress. The combination of strawberries and vanilla creates a timeless flavor pairing that appeals to both children and adults alike.
Best of all, this dessert can be prepared entirely in advance, making it the perfect stress-free treat for entertaining guests or busy schedules.
Why You’ll Love This Strawberry Icebox Cake
There are countless reasons to fall in love with this recipe.
First, it’s completely no-bake. During warm summer months, avoiding the oven can make a huge difference, and this dessert allows you to create something spectacular without heating up the kitchen.
Second, the ingredients are simple and affordable. Most of them can be found in any grocery store, and you may already have some of them in your pantry or refrigerator.
Third, it tastes even better after resting overnight. This makes it an ideal make-ahead dessert because the flavors have time to blend and the texture becomes even more delicious.
Another advantage is its versatility. You can customize the recipe with fresh fruit, different preserves, chocolate layers, or citrus flavors to create unique variations that suit your taste preferences.
Finally, even beginner bakers can make this dessert successfully. There are no complicated techniques involved, making it one of the easiest impressive desserts you’ll ever prepare.
Ingredients
For the Cream Filling
- 2 packages (3.4 ounces each) instant vanilla pudding mix
- 3 cups cold milk
- 8 ounces cream cheese, softened
- 1 cup powdered sugar
- 1 teaspoon vanilla extract
- 2 cups whipped topping or freshly whipped cream
For the Layers
- 2 sleeves graham crackers
- 1 cup strawberry preserves or strawberry jam
For the Topping
- 2 cups whipped topping
- Optional strawberry preserves for decoration
Equipment Needed
Before beginning, gather the following equipment:
- 9×13-inch baking dish or foil pan
- Large mixing bowls
- Electric mixer or stand mixer
- Rubber spatula
- Measuring cups and spoons
- Plastic wrap or aluminum foil
Having everything prepared beforehand helps make the assembly process smooth and efficient.
Preparation Time
- Prep Time: 25 minutes
- Chill Time: 8 hours
- Total Time: 8 hours 25 minutes
Step 1: Prepare the Vanilla Filling
Begin by preparing the pudding mixture.
In a large mixing bowl, combine the instant vanilla pudding mix with the cold milk. Whisk continuously for approximately two minutes until the pudding starts to thicken.
Set the pudding aside for several minutes while preparing the cream cheese mixture.
In a separate bowl, beat the softened cream cheese until completely smooth and creamy. This step is important because softened cream cheese blends more easily and prevents lumps from forming.
Add the powdered sugar and vanilla extract. Continue mixing until the texture becomes silky and smooth.
Gradually add the prepared pudding mixture into the cream cheese mixture while mixing continuously. Beat until everything is fully combined and the filling becomes rich and creamy.
Using a rubber spatula, gently fold in the whipped topping.
Mix carefully until the filling becomes light, fluffy, and uniform in texture.
The finished filling should be smooth, airy, and easy to spread.
Step 2: Prepare the First Layer
Place a single layer of graham crackers across the bottom of your baking dish.
You may need to break some crackers into smaller pieces to fit around the edges and corners. Try to cover the entire bottom surface with as few gaps as possible.
This layer serves as the foundation of the dessert and will soften beautifully as it chills.
Step 3: Add the First Cream Layer
Spread approximately one-third of the prepared cream filling evenly over the graham crackers.
Use a spatula to smooth the surface into an even layer.
If the strawberry preserves are thick, warm them slightly in the microwave for about 10 seconds. This makes them easier to spread.
Drizzle and gently spread a thin layer of strawberry preserves over the cream filling.
The sweet strawberry flavor adds a fruity contrast that complements the creamy vanilla filling perfectly.
Step 4: Build the Second Layer
Place another layer of graham crackers over the strawberry preserves.
Spread another portion of the cream filling evenly across the crackers.
Add another thin layer of strawberry preserves and smooth everything carefully.
Maintaining even layers throughout the dessert helps create beautiful slices when serving.
At this stage, you’ll begin to see the stunning layered structure that makes this dessert so appealing.
Step 5: Complete the Final Layer
Add the final layer of graham crackers.
Spread the remaining cream filling evenly across the surface.
Take your time smoothing the top to create a neat and attractive appearance.
Cover the entire dessert with whipped topping.
Using the back of a spoon or spatula, create decorative swirls and peaks for a bakery-style finish.
If desired, drizzle a small amount of strawberry preserves over the top for extra decoration and flavor.
This simple finishing touch adds visual appeal and hints at the delicious strawberry flavor inside.
Step 6: Chill the Dessert
Cover the dish tightly with plastic wrap or aluminum foil.
Place it in the refrigerator for at least eight hours.
For the best flavor and texture, overnight chilling is highly recommended.
During this time, the graham crackers absorb moisture from the creamy filling and transform into soft, tender layers that resemble traditional cake.
Patience is essential because the texture improves dramatically as the dessert rests.
Step 7: Serve and Enjoy
Once fully chilled, remove the dessert from the refrigerator.
Using a sharp knife, slice into squares and serve cold.
Each slice reveals beautiful layers of vanilla cream, strawberry preserves, fluffy topping, and softened graham crackers.
The texture is smooth, creamy, and melt-in-your-mouth delicious.
Every bite delivers the perfect balance of sweetness, creaminess, and fruity strawberry flavor.
Storage Instructions
One of the best features of this dessert is how well it stores.
Cover any leftovers tightly and keep them refrigerated for up to four days.
Because the recipe contains dairy products, it should remain chilled whenever it is not being served.
Many people actually prefer the cake on the second day because the flavors continue to develop and the layers become even softer.
Delicious Variations
Strawberry Cheesecake Icebox Cake
Increase the cream cheese for a richer cheesecake-inspired version.
This variation delivers a thicker, tangier filling that cheesecake lovers will enjoy.
Mixed Berry Icebox Cake
Replace the strawberry preserves with a combination of blueberry, raspberry, and strawberry preserves.
The mixture creates a vibrant berry flavor and beautiful color variations.
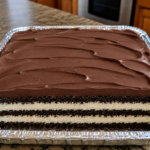
Chocolate Strawberry Icebox Cake
Add thin layers of chocolate ganache between the cream layers.
Chocolate and strawberries are a classic pairing that makes this dessert even more indulgent.
Lemon Strawberry Icebox Cake
Mix fresh lemon zest into the filling.
The citrus brightness balances the sweetness and enhances the strawberry flavor beautifully.
Fresh Strawberry Version
Layer thin slices of fresh strawberries between the cream layers.
This addition provides natural fruit flavor and extra texture.
Tips for Success
For the best results, keep these helpful tips in mind:
- Always use softened cream cheese.
- Allow sufficient chilling time.
- Use high-quality strawberry preserves.
- Spread each layer evenly.
- Chill overnight whenever possible.
- Use freshly whipped cream for an extra luxurious texture.
- Cover tightly while refrigerating.
- Serve cold for the best flavor.
Serving Suggestions
This Strawberry Icebox Cake is perfect for:
- Birthday parties
- Family dinners
- Summer picnics
- Holiday celebrations
- Potluck gatherings
- Baby showers
- Bridal showers
- Weekend desserts
Pair it with fresh strawberries, coffee, tea, or a glass of cold milk for a complete dessert experience.
Final Thoughts
This Strawberry Icebox Cake proves that simple recipes can create extraordinary results. With layers of creamy vanilla filling, sweet strawberry preserves, fluffy whipped topping, and soft graham crackers, every bite is rich, refreshing, and incredibly satisfying.
The no-bake preparation makes it ideal for warm weather, while its elegant appearance makes it suitable for special occasions throughout the year. Easy enough for beginners yet impressive enough for guests, this dessert truly offers the best of both worlds.
Whether you’re preparing it for a family gathering, holiday celebration, or simply treating yourself to something sweet, this Strawberry Icebox Cake is guaranteed to become a favorite recipe you’ll return to again and again. After just one bite, you’ll understand why this classic dessert has remained beloved for generations.