There’s something incredibly nostalgic about biting into a sweet, jam-filled pop tart. For many of us, toaster pastries were a favorite childhood breakfast or after-school snack. But once you try homemade sourdough pop tarts, it’s hard to go back to the packaged version. These flaky pastries are made with real butter, filled with your favorite sweet preserves, and enhanced with sourdough discard for a subtle tangy flavor that makes them taste like they came straight from a bakery.
Not only are these homemade pop tarts delicious, but they are also a fantastic way to use up extra sourdough discard. Instead of throwing away leftover starter, you can transform it into a rich, buttery pastry dough that bakes into golden perfection. The result is a crisp and tender crust wrapped around a sweet filling that melts beautifully during baking.
Whether you enjoy them for breakfast, dessert, or an afternoon treat with coffee or tea, these homemade sourdough pop tarts are guaranteed to become a family favorite.
Why You’ll Love This Recipe
One of the biggest advantages of this recipe is that it helps reduce food waste. If you regularly bake sourdough bread, you probably have extra discard sitting in your refrigerator. This recipe gives that discard a delicious new purpose.
Another reason to love these pastries is their texture. The combination of cold butter and sourdough creates layers that bake into a flaky, crisp crust. Every bite offers a wonderful contrast between the buttery pastry and the sweet filling inside.
They’re also incredibly versatile. You can fill them with:
- Strawberry jam
- Blueberry preserves
- Raspberry jam
- Chocolate hazelnut spread
- Apple pie filling
- Brown sugar cinnamon mixture
- Cherry preserves
- Lemon curd
You can even make multiple flavors in one batch so everyone gets their favorite.
Ingredients
For the Dough
- 2 cups all-purpose flour
- 1 tablespoon granulated sugar
- ½ teaspoon salt
- ½ cup cold unsalted butter, cubed
- ½ cup sourdough discard
- 2–4 tablespoons cold milk
For the Filling
- ½ cup jam or preserves of your choice
For the Egg Wash
- 1 egg
- 1 tablespoon milk
Optional Vanilla Glaze
- 1 cup powdered sugar
- 2 tablespoons milk
- ½ teaspoon vanilla extract
Equipment Needed
- Large mixing bowl
- Pastry cutter or fork
- Rolling pin
- Baking sheet
- Parchment paper
- Pastry brush
- Sharp knife
Step 1: Prepare the Pastry Dough
In a large mixing bowl, whisk together the flour, sugar, and salt until well combined.
Add the cold butter cubes to the flour mixture. Using a pastry cutter or fork, work the butter into the flour until the mixture resembles coarse crumbs. Small pieces of butter should still remain visible because they create flaky layers during baking.
Add the sourdough discard and gently mix.
Slowly add cold milk, one tablespoon at a time, until the dough begins to come together. Be careful not to overmix. The dough should be soft but not sticky.
Form the dough into a flat disk.
Step 2: Chill the Dough
Wrap the dough tightly in plastic wrap and refrigerate for at least 30 minutes.
This chilling step is essential because it allows the butter to firm up again. Cold butter creates steam during baking, which produces the flaky texture that makes these pastries so special.
While the dough chills, prepare your filling and baking equipment.
Step 3: Roll Out the Dough
Lightly flour your work surface.
Remove the chilled dough from the refrigerator and roll it into a large rectangle approximately ⅛ inch thick.
Using a knife or pizza cutter, cut the dough into 16 equal rectangles.
Try to keep the rectangles as uniform as possible so the pop tarts bake evenly.
Step 4: Fill the Pastries
Place eight rectangles on a parchment-lined baking sheet or work surface.
Add about one tablespoon of jam or preserves to the center of each rectangle.
Avoid spreading the filling too close to the edges. Leave about a ½-inch border around each pastry to prevent leaking during baking.
If using chocolate spread, slightly chill it beforehand to make filling easier.
Step 5: Seal the Pop Tarts
Place the remaining rectangles over the filled pastries.
Press the edges together gently with your fingers.
Use a fork to crimp the edges firmly, creating a decorative border while ensuring the filling stays inside.
With a small knife, cut two or three tiny slits in the top of each pastry. These vents allow steam to escape during baking.
Step 6: Apply the Egg Wash
In a small bowl, whisk together the egg and milk.
Using a pastry brush, lightly brush the tops of all the pastries.
The egg wash helps create a beautiful golden-brown color and gives the finished pop tarts a professional bakery-style appearance.
Step 7: Bake Until Golden
Preheat your oven to 375°F (190°C).
Place the baking sheet into the preheated oven and bake for 18 to 20 minutes.
As they bake, the pastries will puff slightly and turn a gorgeous golden brown.
The sweet aroma of butter and jam filling your kitchen is one of the best parts of making homemade pop tarts.
Once baked, remove them from the oven and allow them to cool completely on a wire rack.
Step 8: Make the Vanilla Glaze
For an authentic pop tart finish, prepare the simple vanilla glaze.
In a small bowl, whisk together:
- Powdered sugar
- Milk
- Vanilla extract
Mix until smooth and pourable.
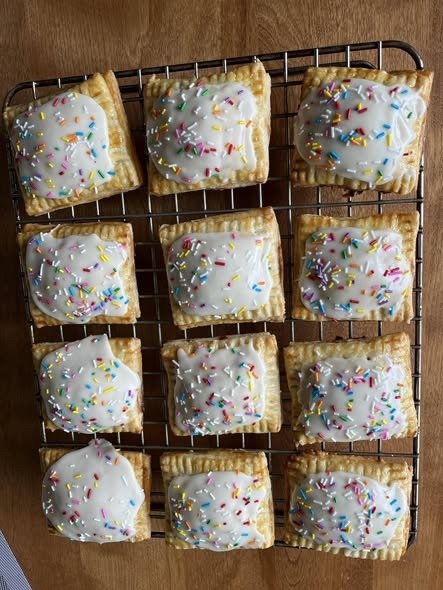
Spread or drizzle the glaze over the cooled pastries.
Allow the glaze to set for about 15 minutes before serving.
Flavor Variations
Strawberry Classic
Fill with strawberry jam and top with vanilla glaze.
Blueberry Delight
Use blueberry preserves and sprinkle a little lemon zest into the glaze.
Chocolate Lovers
Fill with chocolate hazelnut spread and drizzle melted chocolate over the top.
Brown Sugar Cinnamon
Combine brown sugar, cinnamon, and a small amount of butter for a warm, comforting filling.
Apple Pie Pop Tarts
Fill with homemade apple pie filling and finish with cinnamon glaze.
Storage Tips
Store cooled pop tarts in an airtight container at room temperature for up to 3 days.
For longer storage, refrigerate them for up to one week.
To reheat, simply place them in a toaster oven or conventional oven for a few minutes until warm.
Freezing Instructions
These pastries freeze beautifully.
After baking and cooling, place them in a freezer-safe container with parchment paper between layers.
Freeze for up to 3 months.
When ready to enjoy, thaw overnight in the refrigerator and warm in the oven.
Tips for Success
- Always use cold butter.
- Chill the dough before rolling.
- Don’t overfill the pastries.
- Seal edges carefully to prevent leaks.
- Allow pastries to cool before glazing.
- Use high-quality preserves for the best flavor.
Final Thoughts
Homemade Sourdough Pop Tarts combine everything people love about classic toaster pastries with the rich flavor and quality of homemade baking. The buttery, flaky crust paired with sweet fruit filling creates an irresistible treat that’s perfect for breakfast, snacks, dessert, or special occasions. Thanks to the addition of sourdough discard, these pastries have a depth of flavor that makes them far superior to store-bought versions.
Once you make a batch from scratch, you’ll discover just how easy and rewarding homemade pop tarts can be. Whether filled with fruity jam, rich chocolate, or warm cinnamon sugar, these flaky pastries are guaranteed to disappear quickly from the table.